
Tying the Cumberland Crayfish
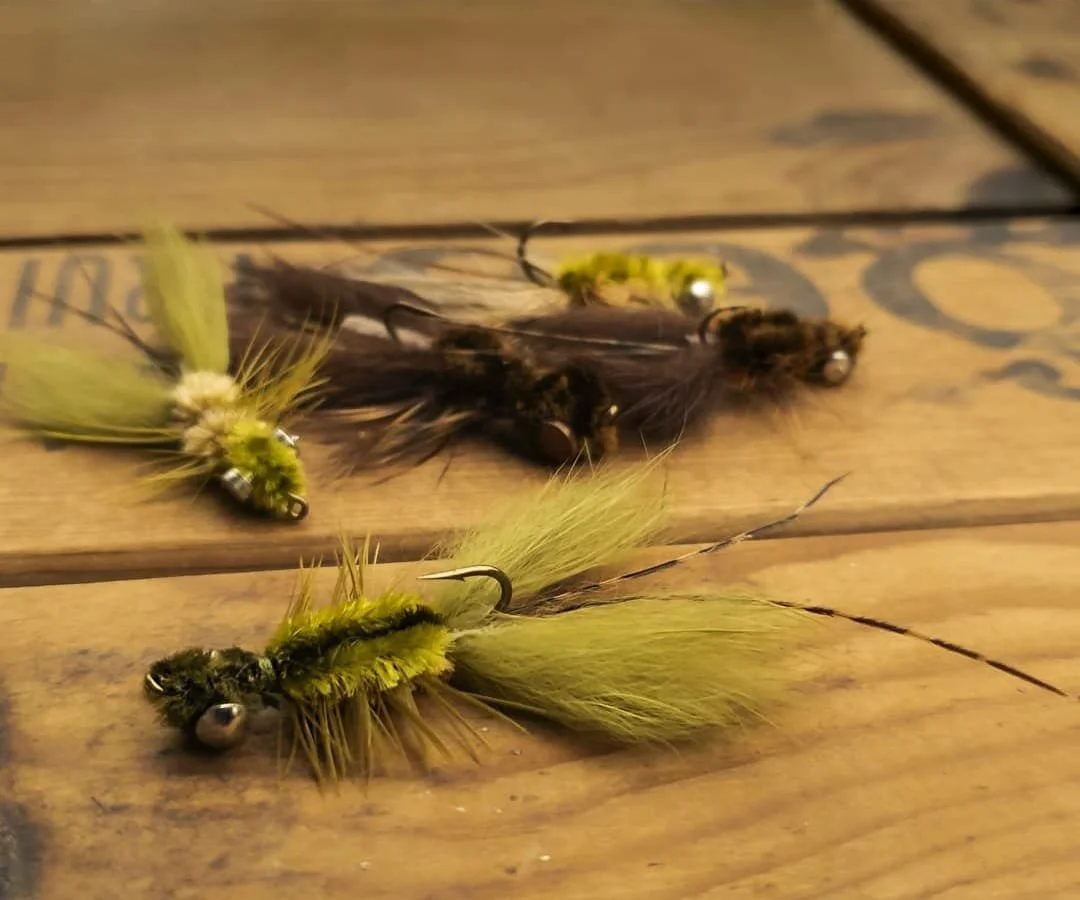
Cumberland Crayfish. Original pattern created by Rob Knisely, circa 2010.
This is the only crayfish pattern I use. Many others are wonderful and look nice, but this one looks and acts as the natural does. Let it settle to the bottom (or as close as possible), give it a couple twitches, then strip-strip-strip. Repeat. Imagine a crayfish darting up from the rocks and using its tail to scoot through the water in bursts.
I would classify this as an intermediate level pattern. Beginners may struggle, but if they can work out how to manipulate the materials, a lot of skill can be gained by tying it. There are tips throughout that explain how I achieve some steps, but there are often several ways to do them. Size 6 is my go-to size, but sizes 4 and 8 can be useful as well, just adjust the hourglass eye size to match.
Feel free to use this page as you tie, or print it out. Please respect the copyright and do not repost elsewhere without permission.
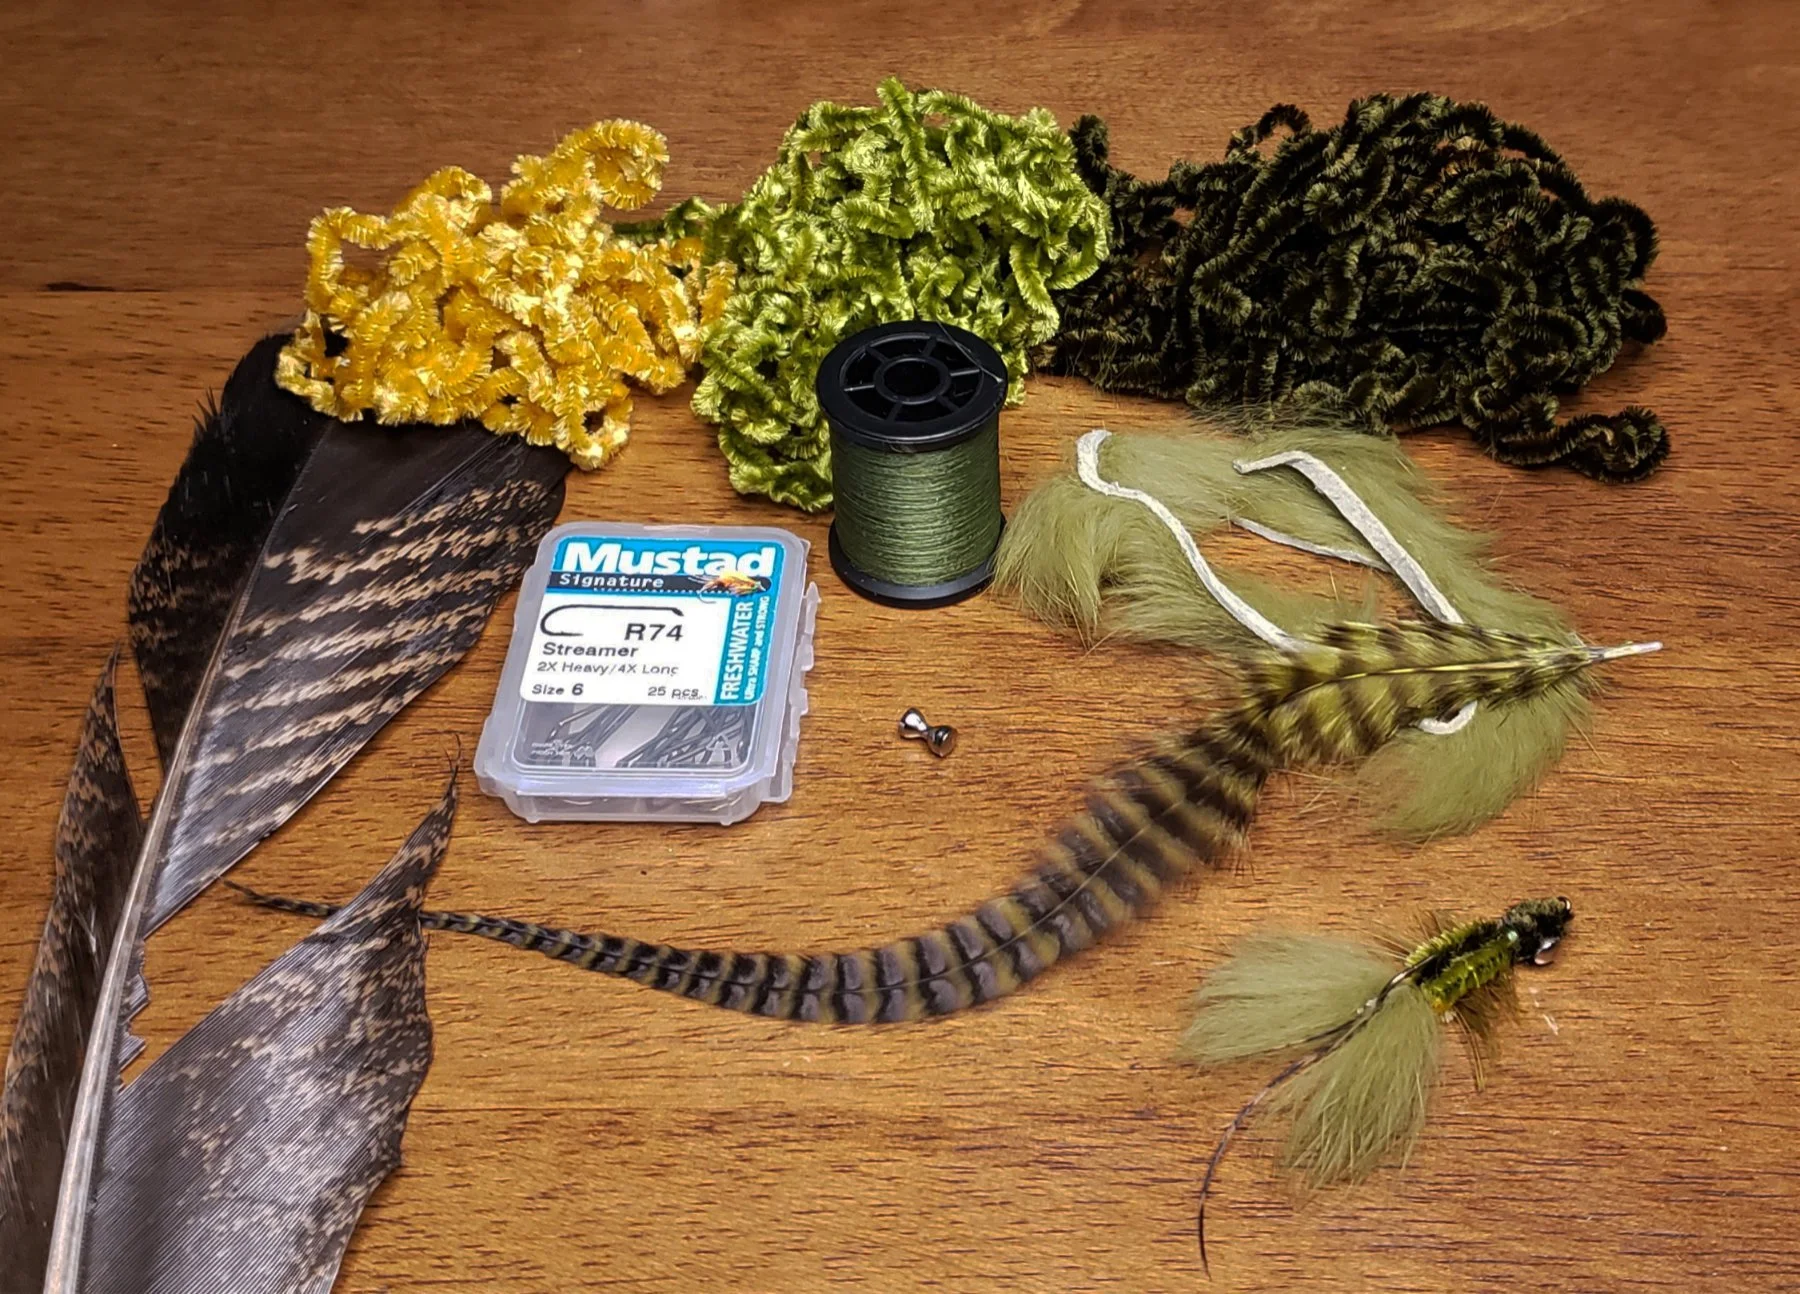
Materials List:
Hook: Mustad R74, size 6
Thread: 6/0 to match dark back chenille
Weight: hourglass eyes, 5/32 inch or 1/24 oz.
Antennae: wild turkey tail fibers
Pincers: rabbit strips, 3 mm or 1/8 inch wide
Back: medium chenille, color to match natural
Belly: medium chenille, pale or lighter color
Legs: webby saddle hackle
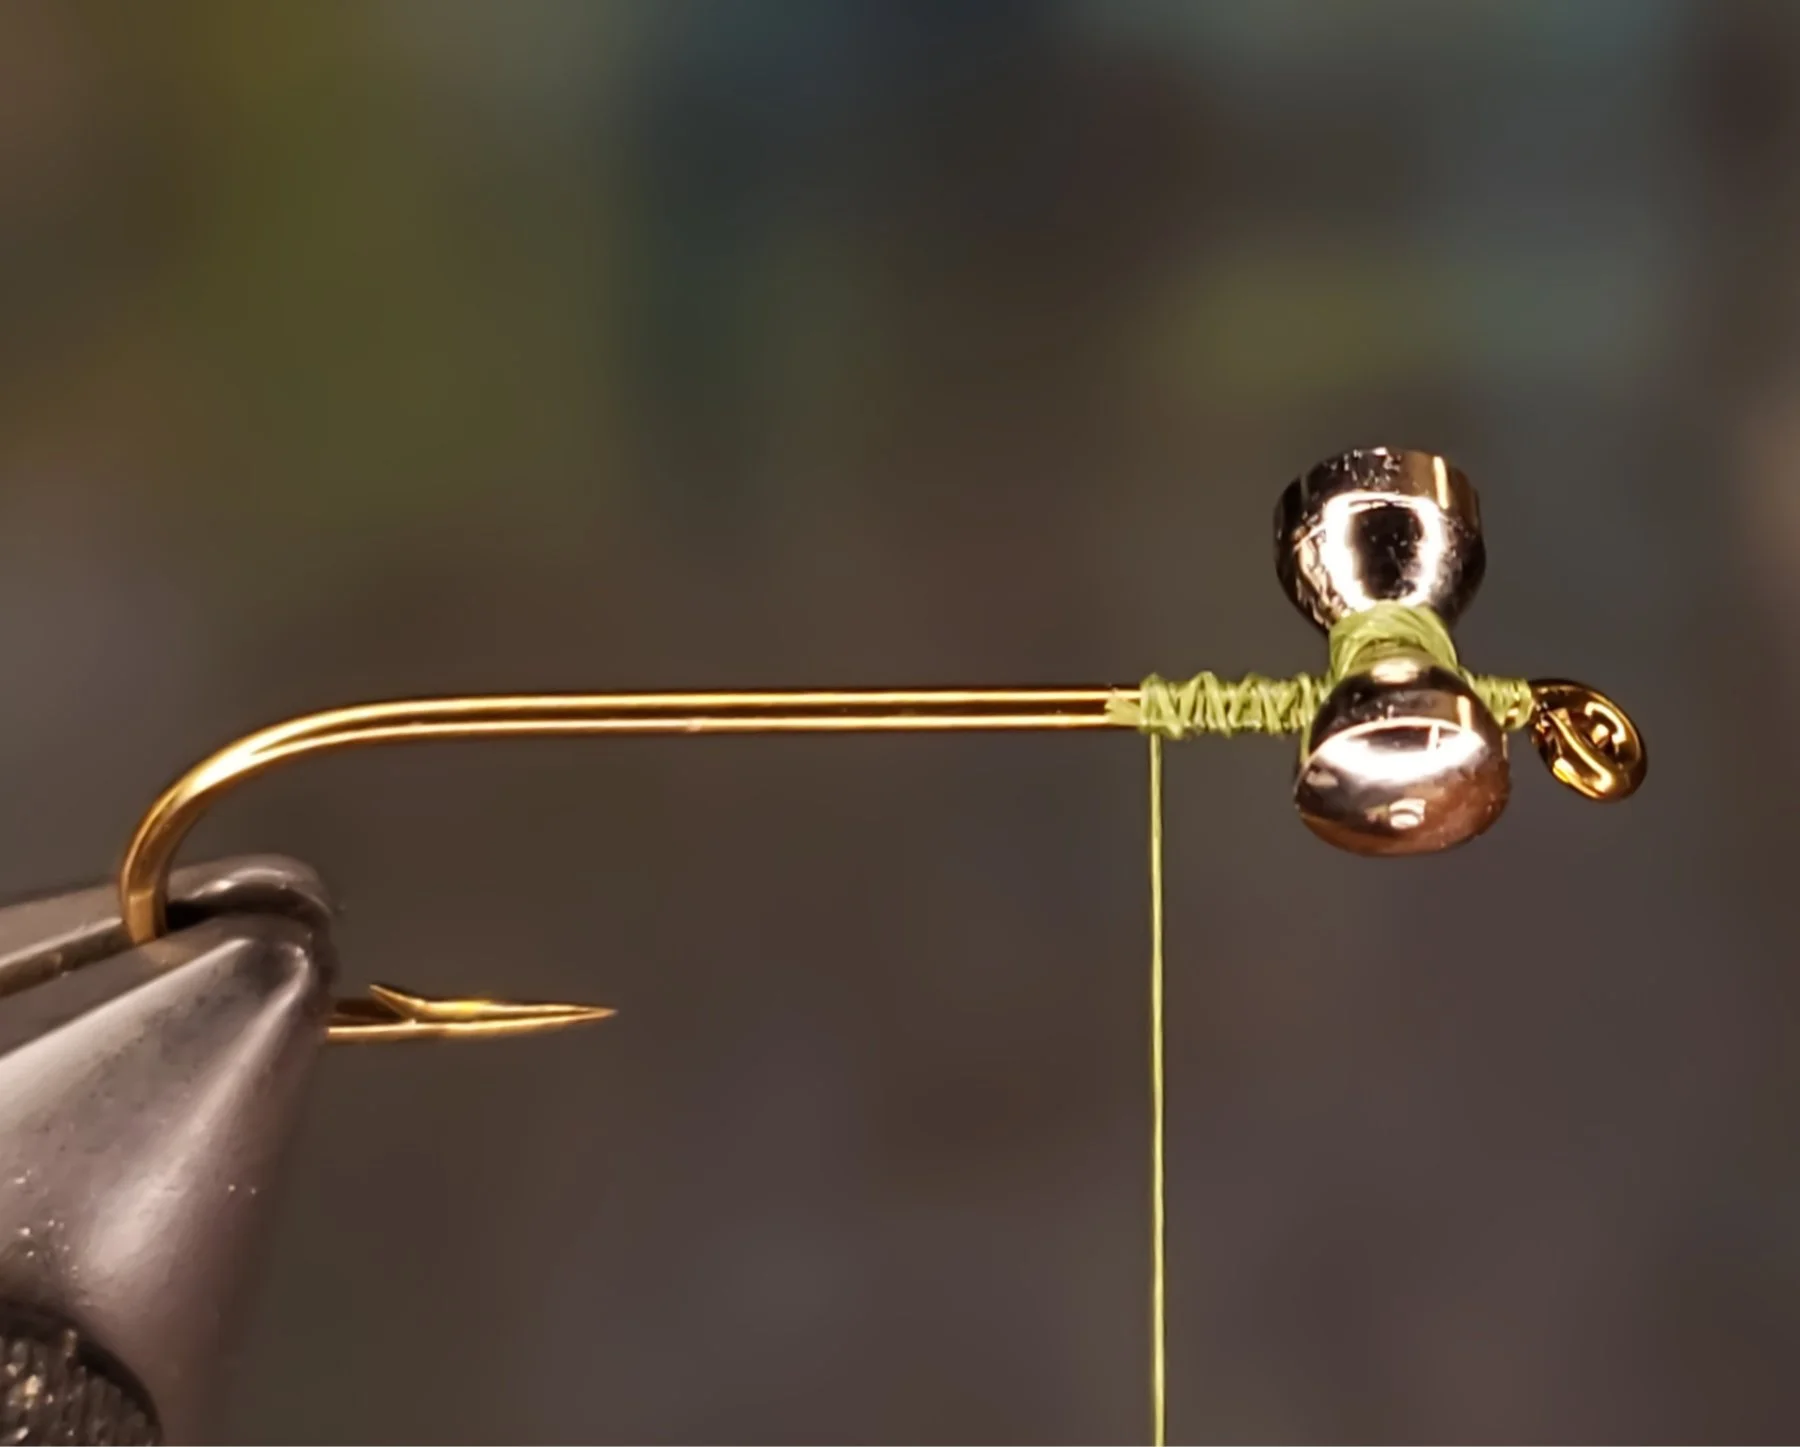
Eyes
The hook I’m using is a basic streamer hook, the same I use for Wooly Buggers. As long as the proportions are similar, other brands of hooks will do just fine.
Lay down a base of thread at the front of the hook shank. Position the hourglass eyes so that once tied in, there will be a space left on the shank equal to the width of the hook eye. Attach by taking five turns of threads diagonally over the hourglass, behind the hourglass on the near side, over to the far side in front of the hourglass. Now take five or six tighter wraps diagonally in the other direction, making an X. You’ll see as you take more wraps, they will start to move the hourglass more perpendicular to the shank. Finish by taking five very tight wraps of thread clockwise between the shank and the hourglass, essentially pinching the previous wraps. This straightens the hourglass nicely.
Wind the thread back toward the bend and add some cement to the hourglass eyes wraps. I use slightly thinned lacquer, but use whatever you’re comfortable with.
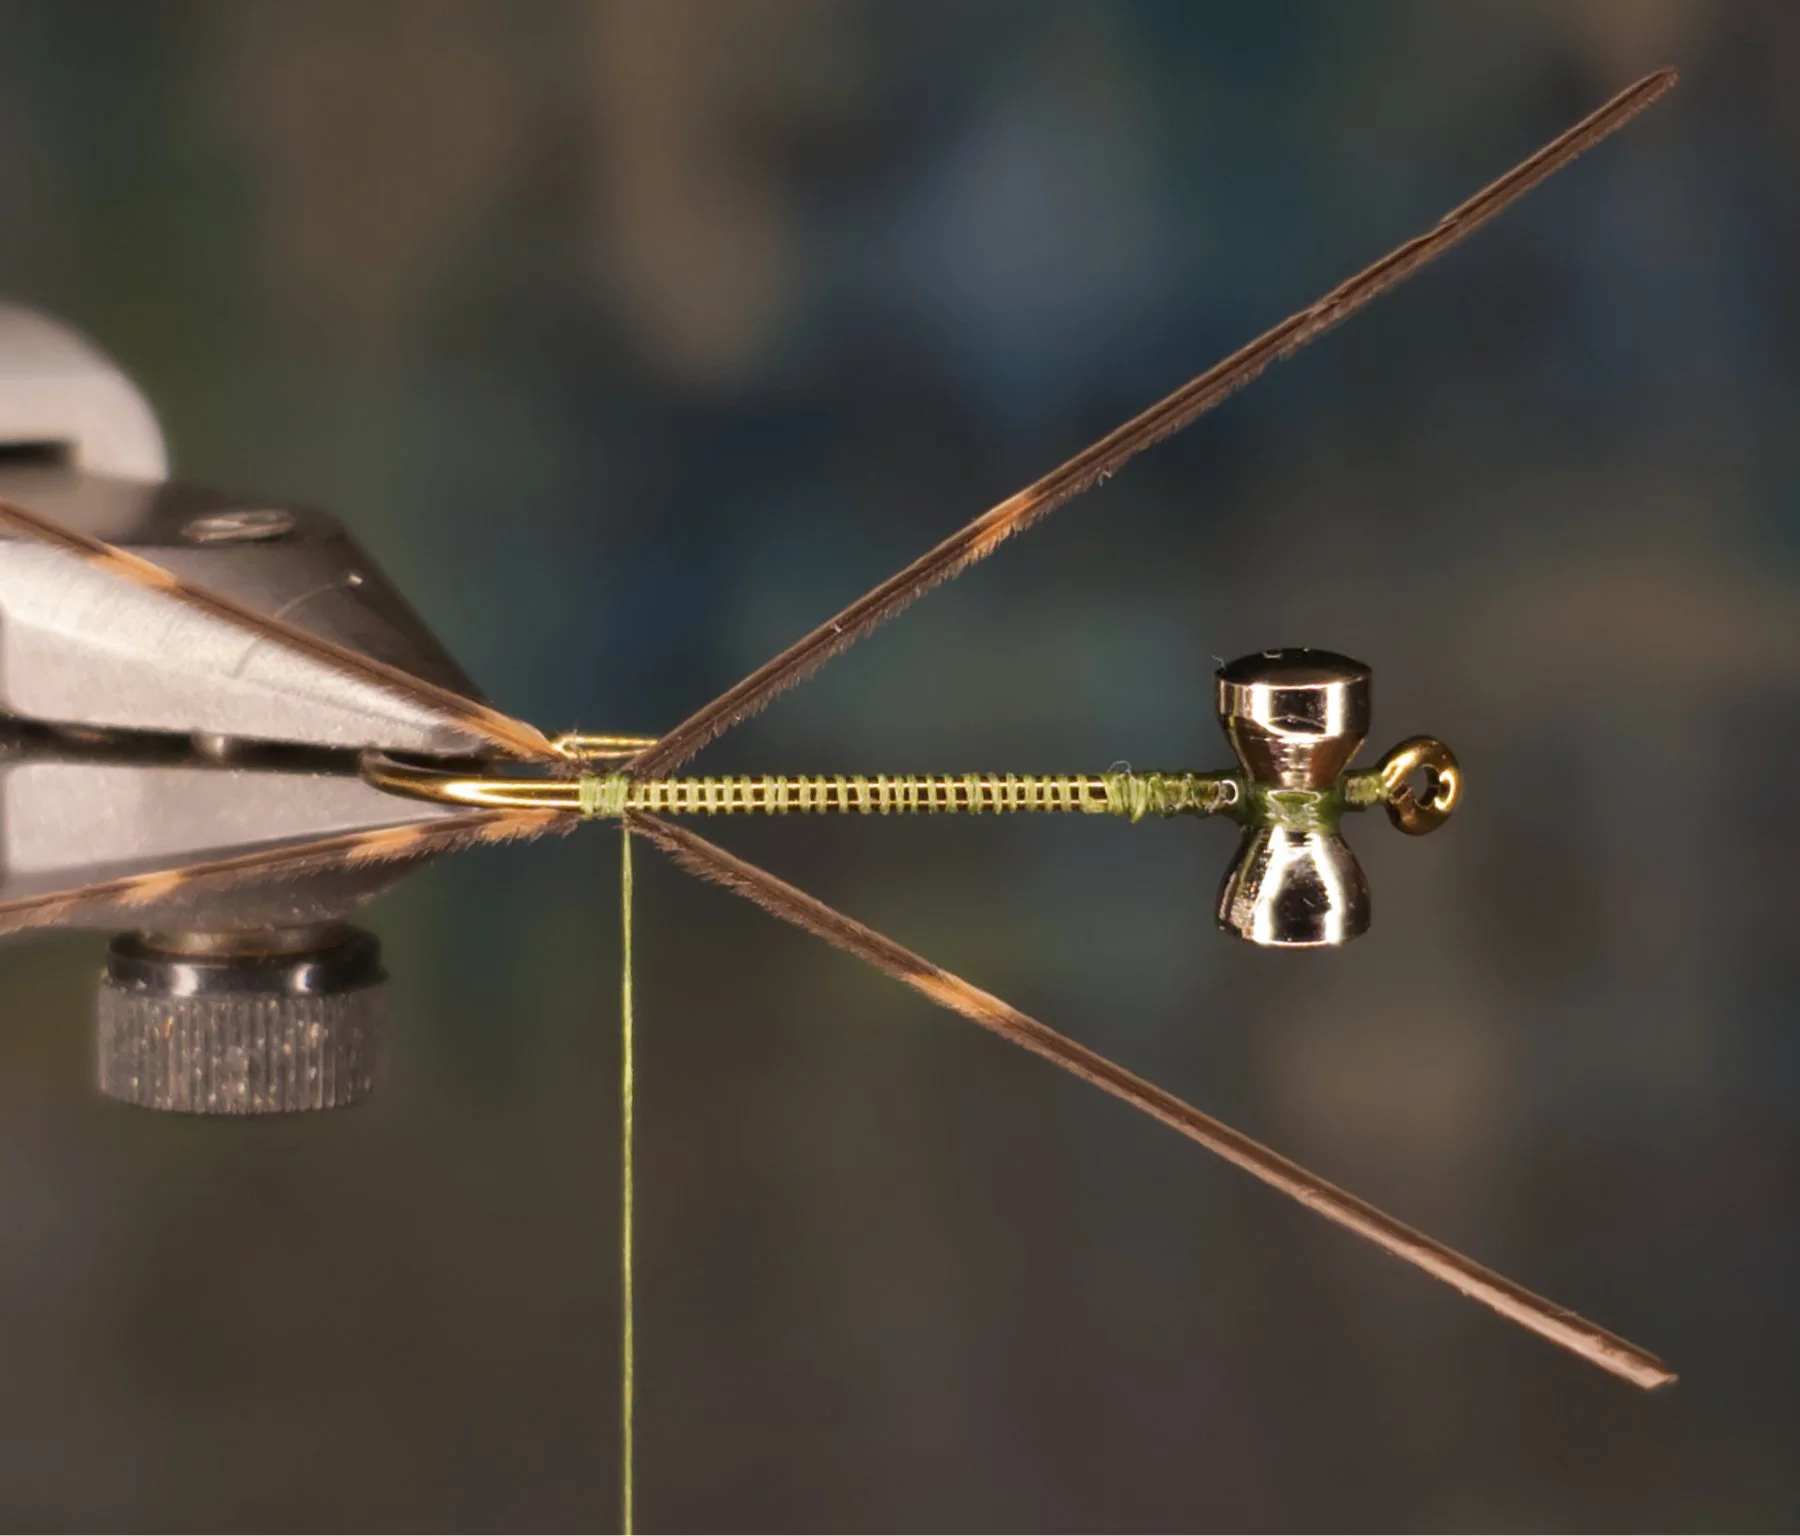
Antennae
Select a couple nice barbs from a wild turkey tail feather. The length of the antennae should be about one and half times the length of the entire hook. Attach them on either side of the shank so they curve away from each other. I find it easiest to put one thread wrap over one, then position the other and continue tying in with three or four wraps next to each other. Clip the excess butt ends.
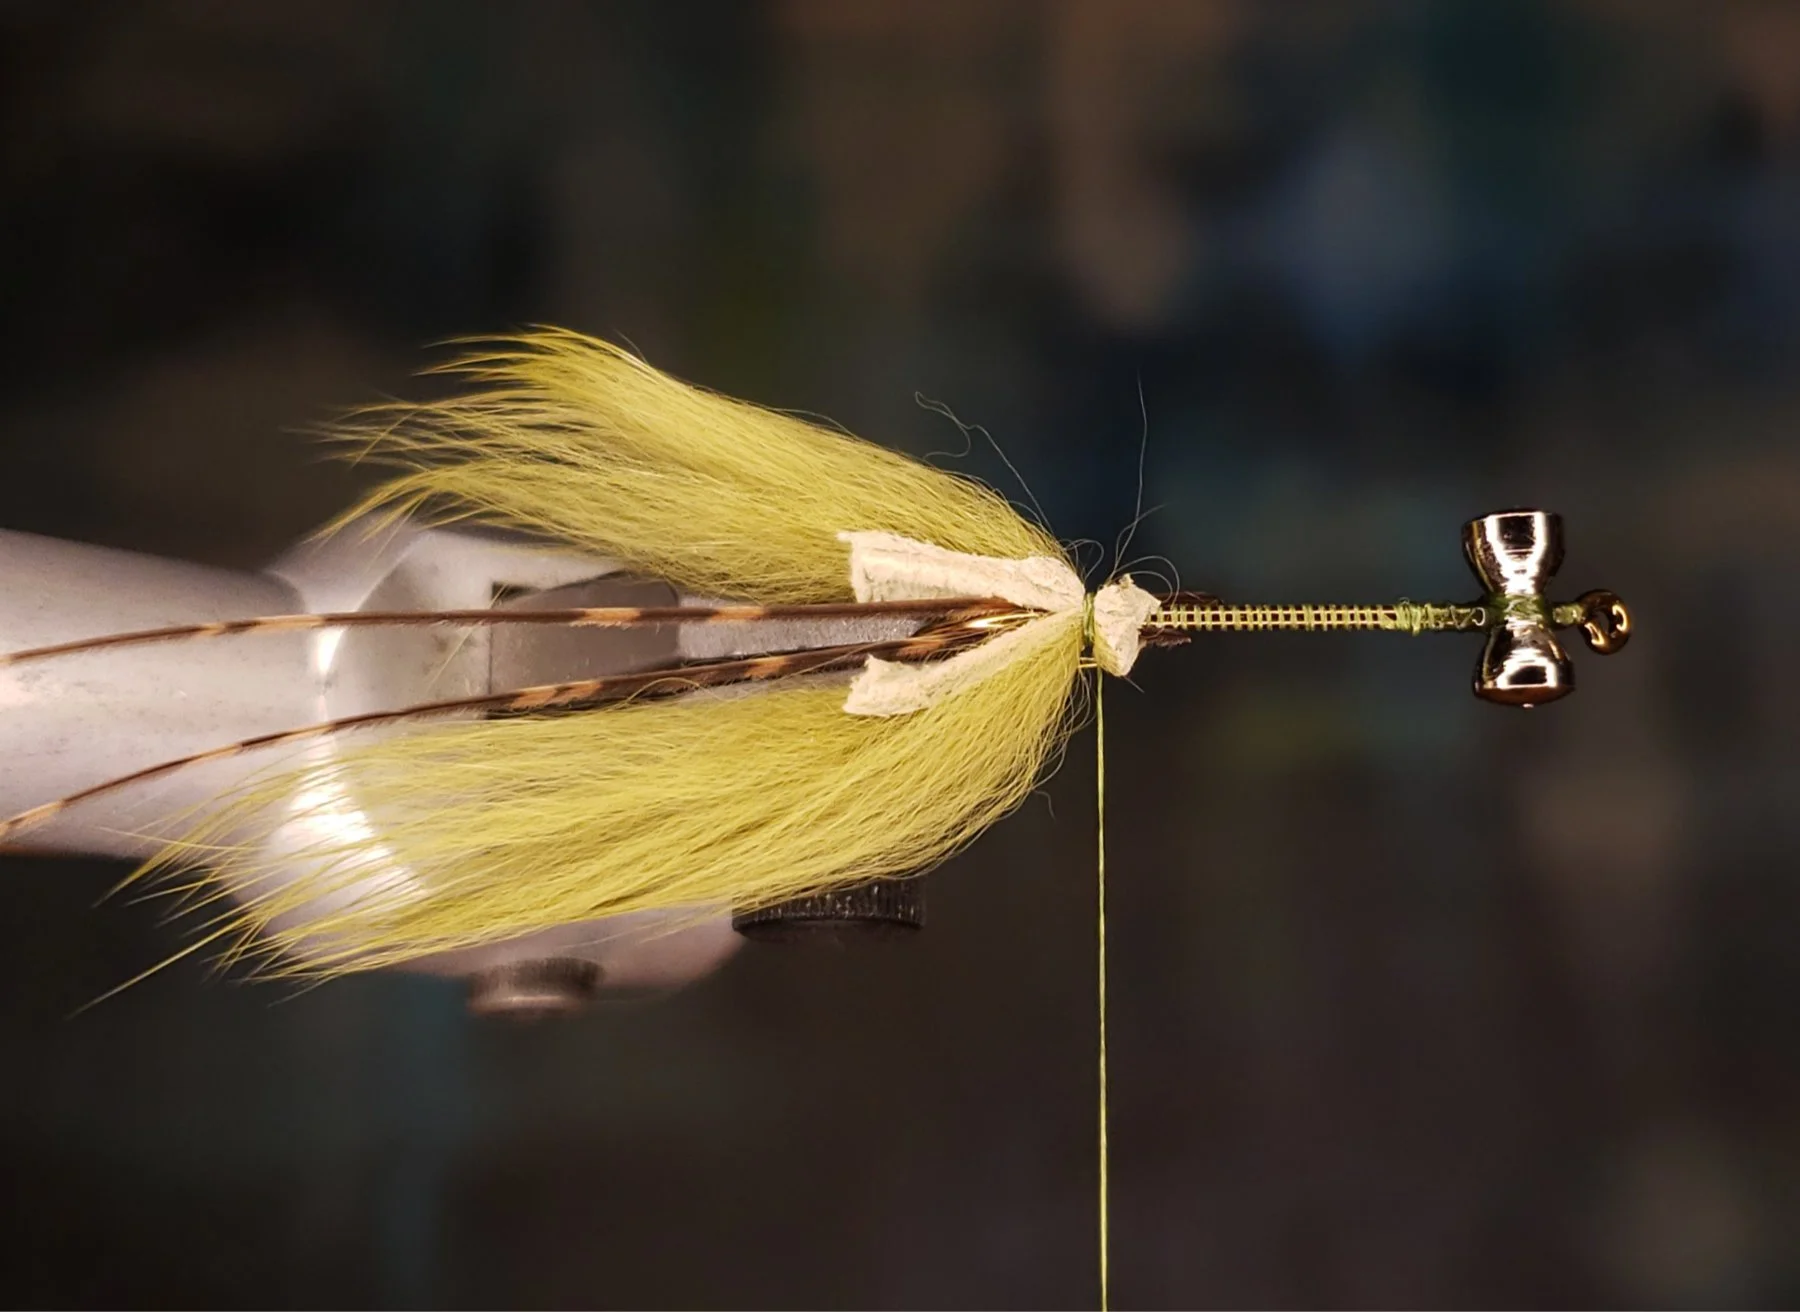
Pincers
Use a razor blade (I use a box cutter) to cut two pieces of the rabbit strip, length just slightly more than the hook gap. Be careful not to cut any of the hairs. Rather than laying it flat on a table, hold the strip taught in one hand, making sure all hairs are free, and slice through the hide. Tie these in on either side of the hook shank right over the tie-in area of the antennae. Use very tight wraps and add cement to secure. If your cement isn’t thin enough to soak all the way into the thread, add a couple drops of thin super glue to the wraps.
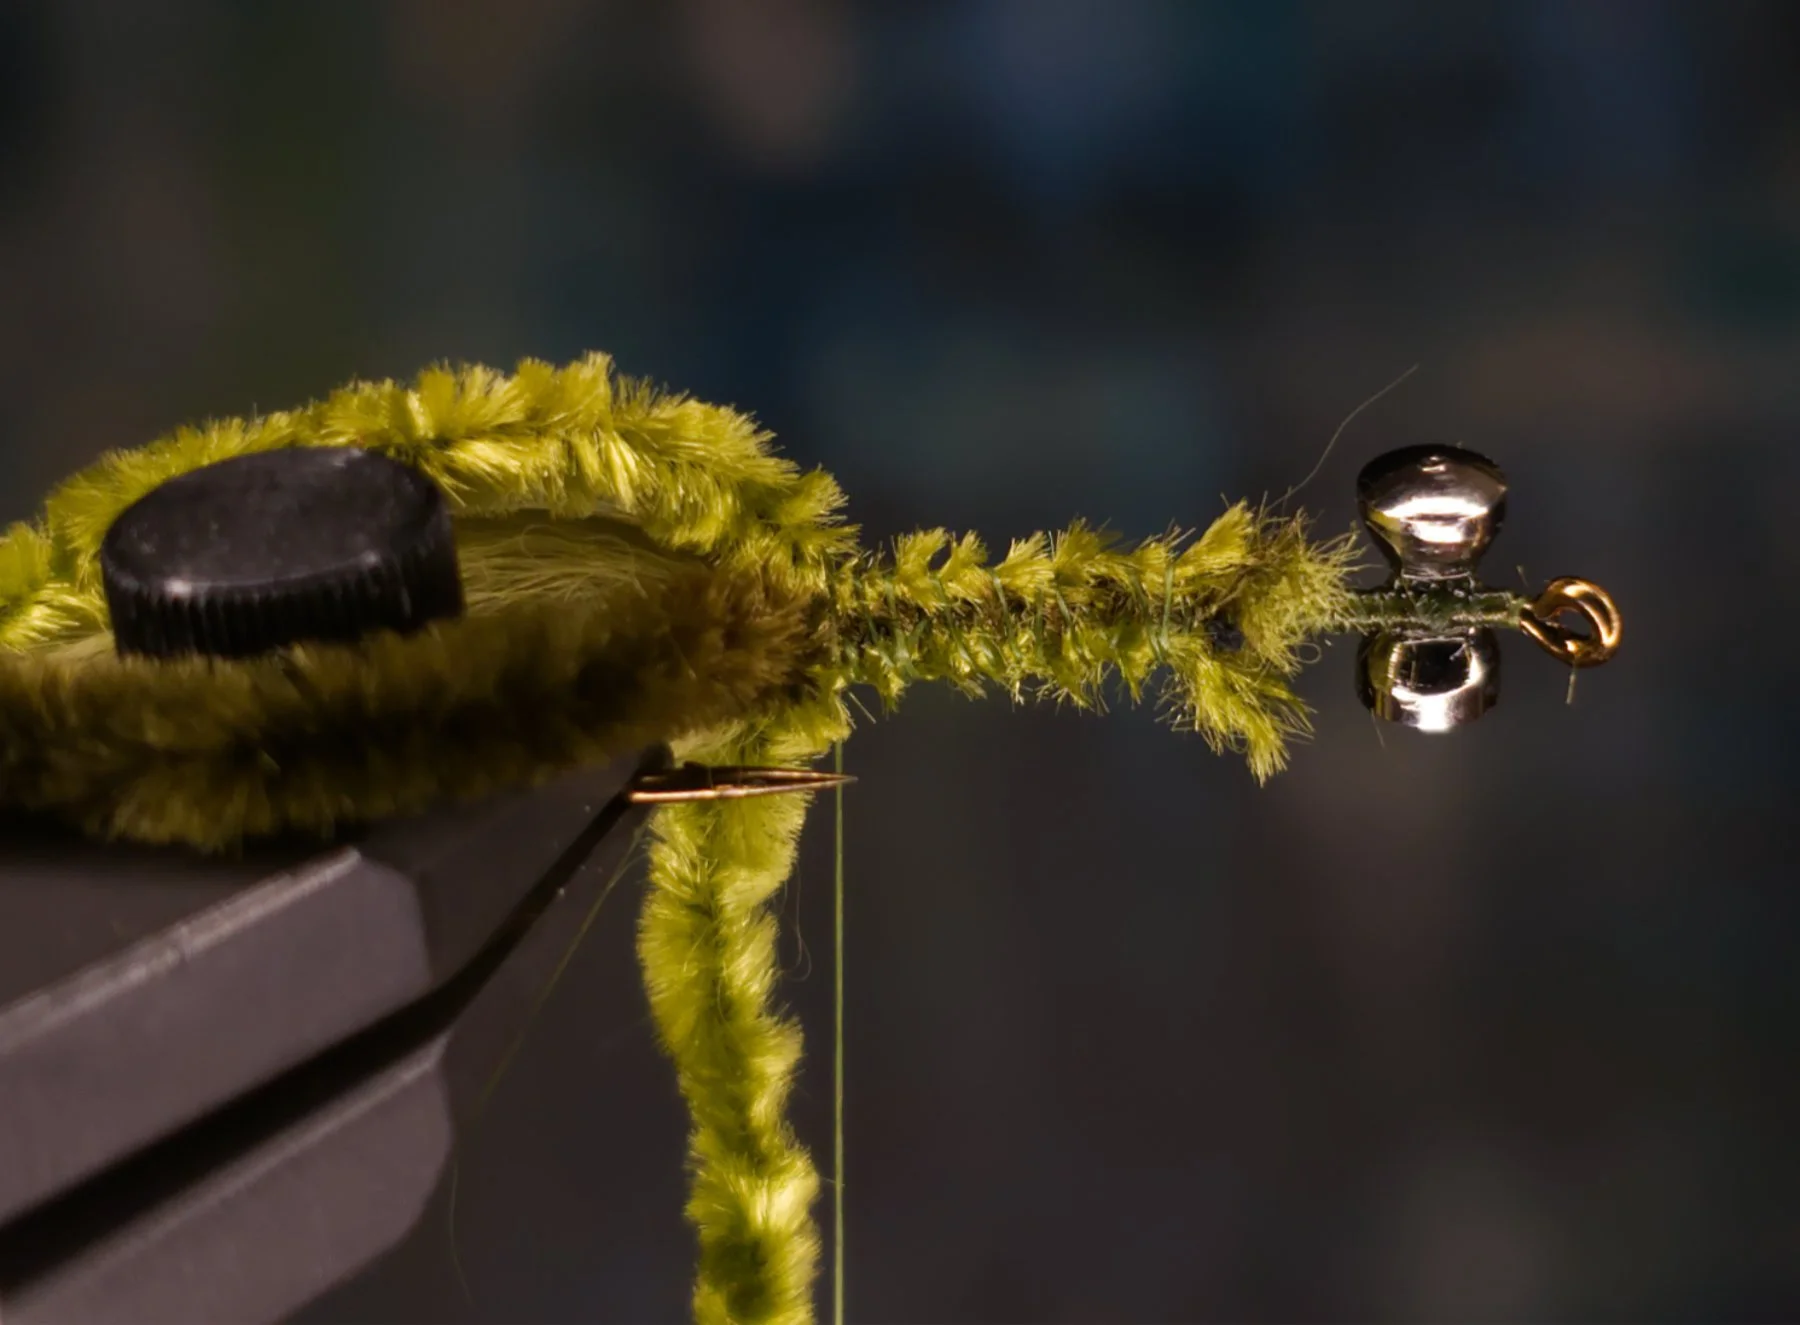
Back, part one
Now we’re going to work on the underside of the hook, which will be the back of the finished fly. Turn the fly upside-down, or just flip the hook over in the vise if you don’t have a rotary-style vise. Three strands of chenille make up the back- one longer strand that will later be wound around the hourglass, and two shorter strands that go on either side of that. Start with the middle longer strand (in the photo it’s the darker color, but you can make all three strands the same color. Just make sure it’s darker than the belly chenille).
Tie in the longer strand a bit back from the hourglass on what is now the top of the hook shank (technically the underside of the hook if it wasn’t upside-down). The excess should extend back beyond the hook bend. Hold the chenille strand up a little as you spiral the thread back toward the bend, lashing it to the hook. Finish with a couple wraps right over the tie-in are of the rabbit strips. You can sneak in with a finger or bodkin to help position the thread where the hook point gets in the way.
Wind the thread back up to the tie-in and repeat for the two shorter strands, placing them on either side of the first one. Leave the thread at the bend for the next step.

Belly and Legs
Select a nice long saddle hackle that has quite a bit of webbing, a little more web than you might use for a wooly bugger, but with fibers about as long as you would use for a wooly bugger on a hook this size. Trim the fibers from both sides of the feather at the base leaving ample stem for tying in. Note in the photo how long mine is. It doesn’t have to be this long, but it doesn’t matter as it’ll be covered up. The fibers at the base after trimming should be a bit longer than the hook gap. Tie the feather in at the bend with the dull, front side facing forward.
Next, tie in the belly chenille, excess to the rear. I like to place this on the far side opposite the feather tie-in. Wind the thread forward to behind the hourglass. Leave a hook eye width gap or so between the tying thread and the hourglass.
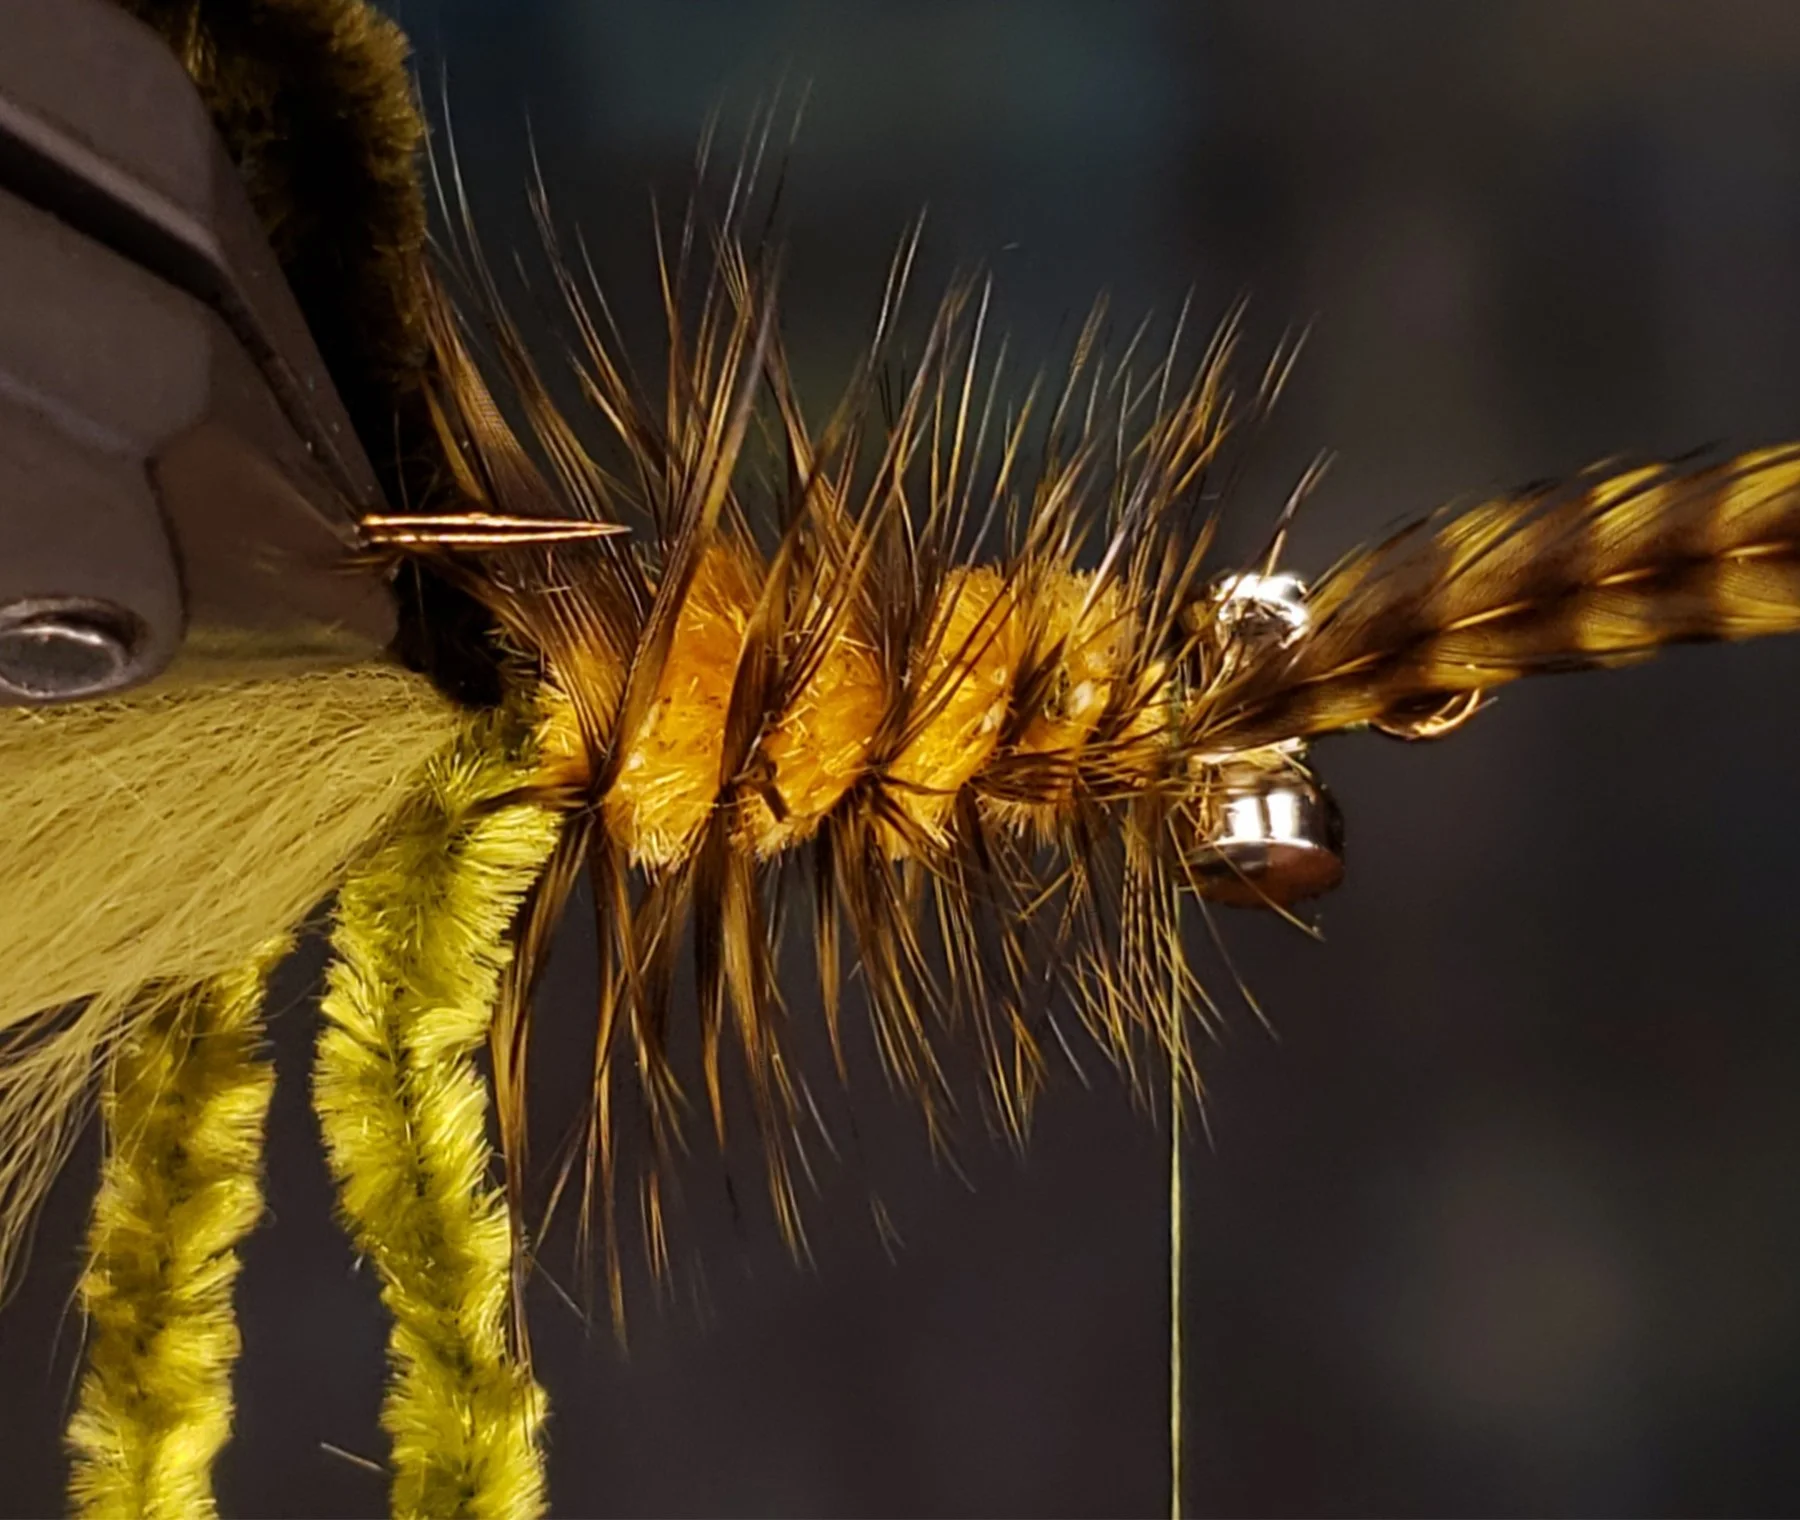
Wrap the belly chenille forward, tie down with three or four wraps, and clip the excess.
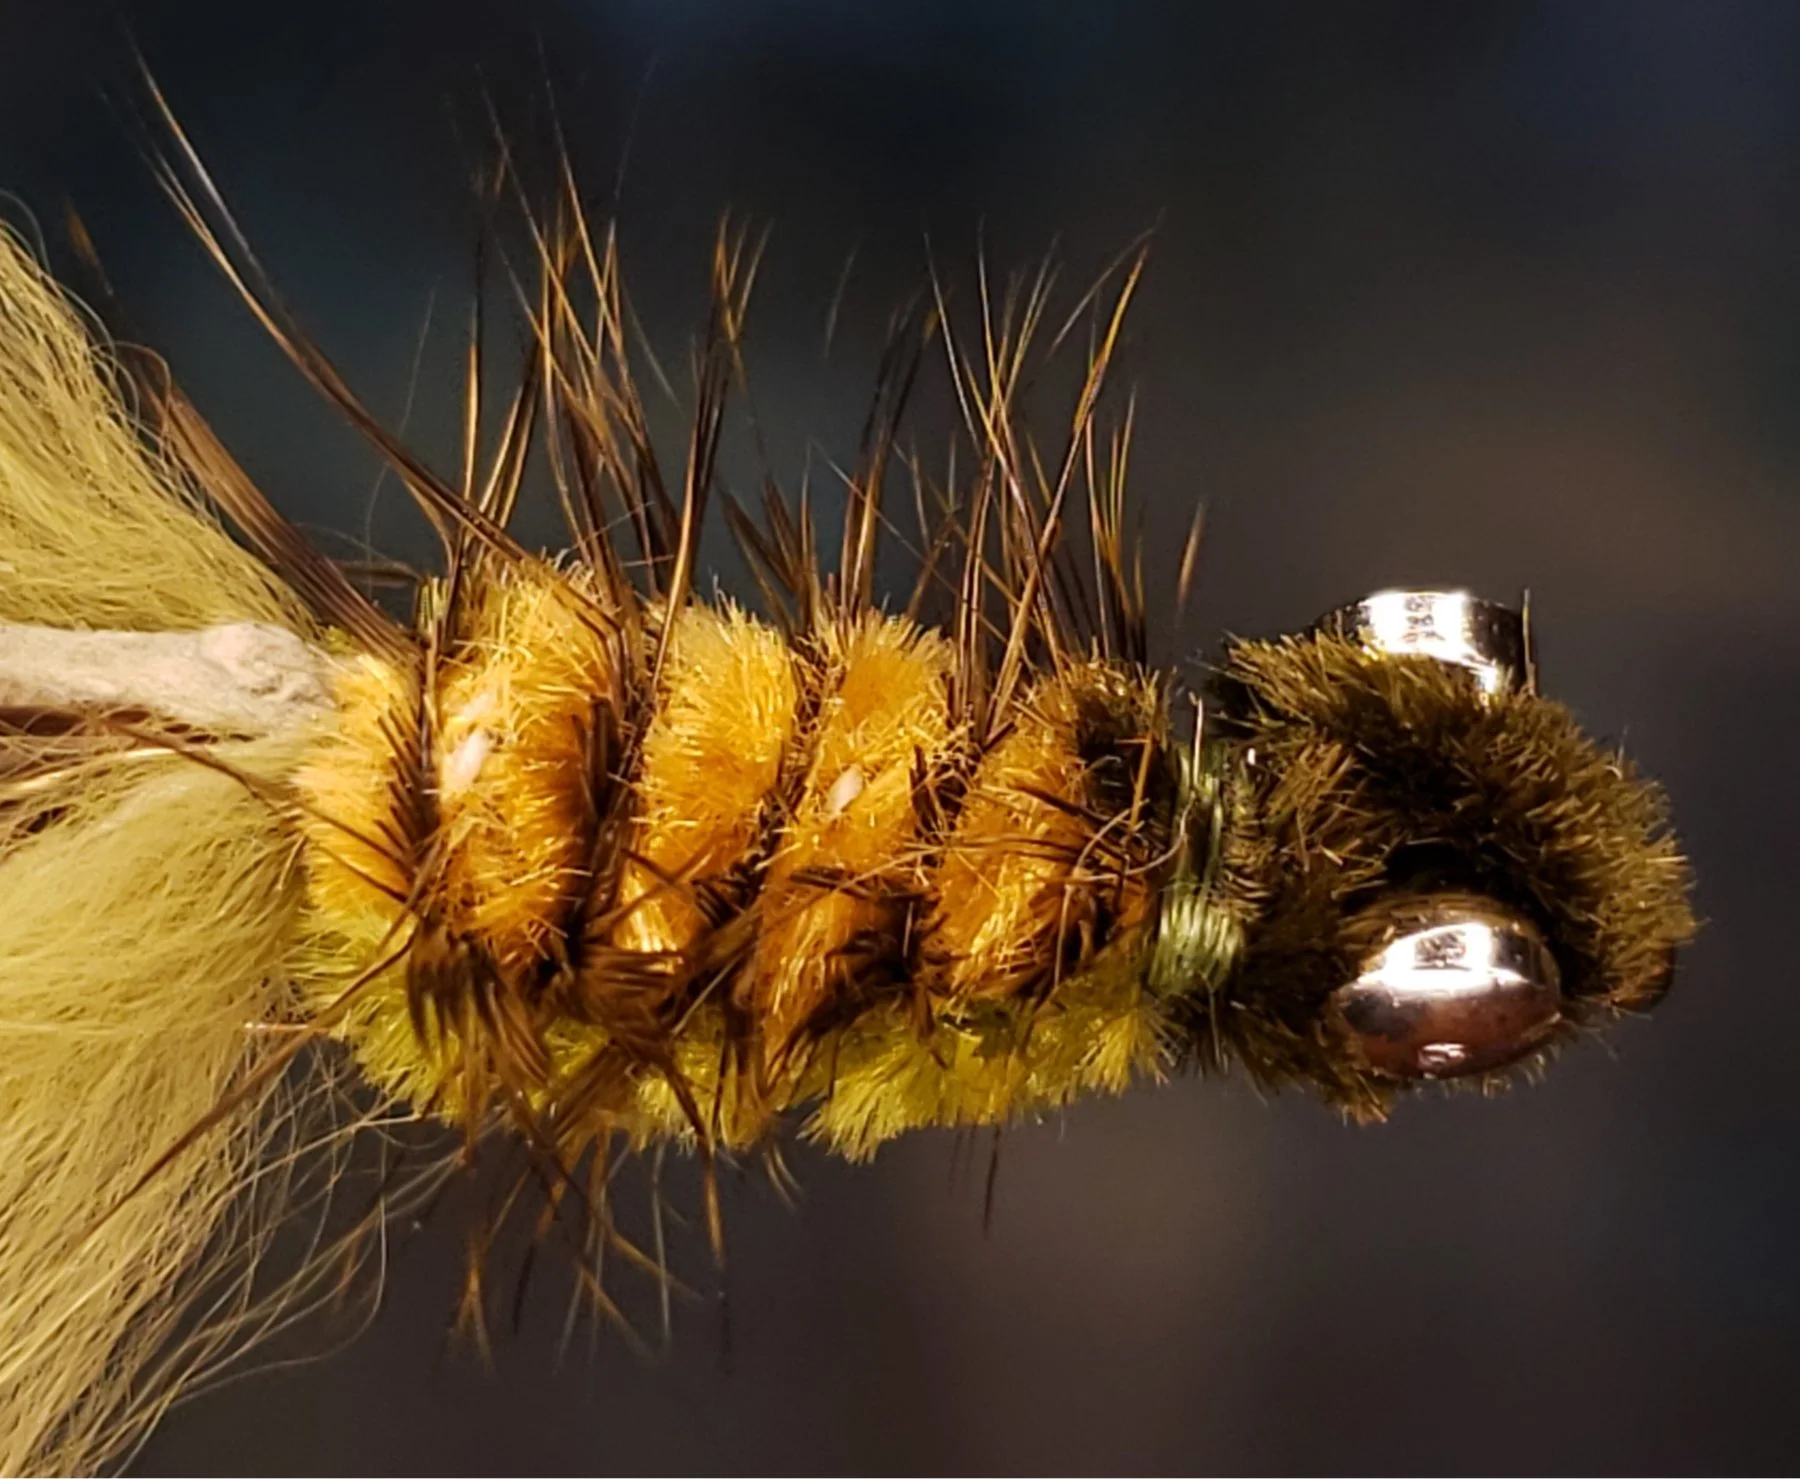
Spiral the saddle hackle forward, using your fingers to stroke the feathers to the rear, which helps place and separate them. For spacing, just kinda eyeball it. The fibers will be trimmed top and bottom, so make your wraps tight enough that you’ll end up with enough “legs” sticking out to the sides for your liking. Tie off the hackle and clip the excess.
Trim the hackle on top (the technical underside of the hook) to make a wide V shape.
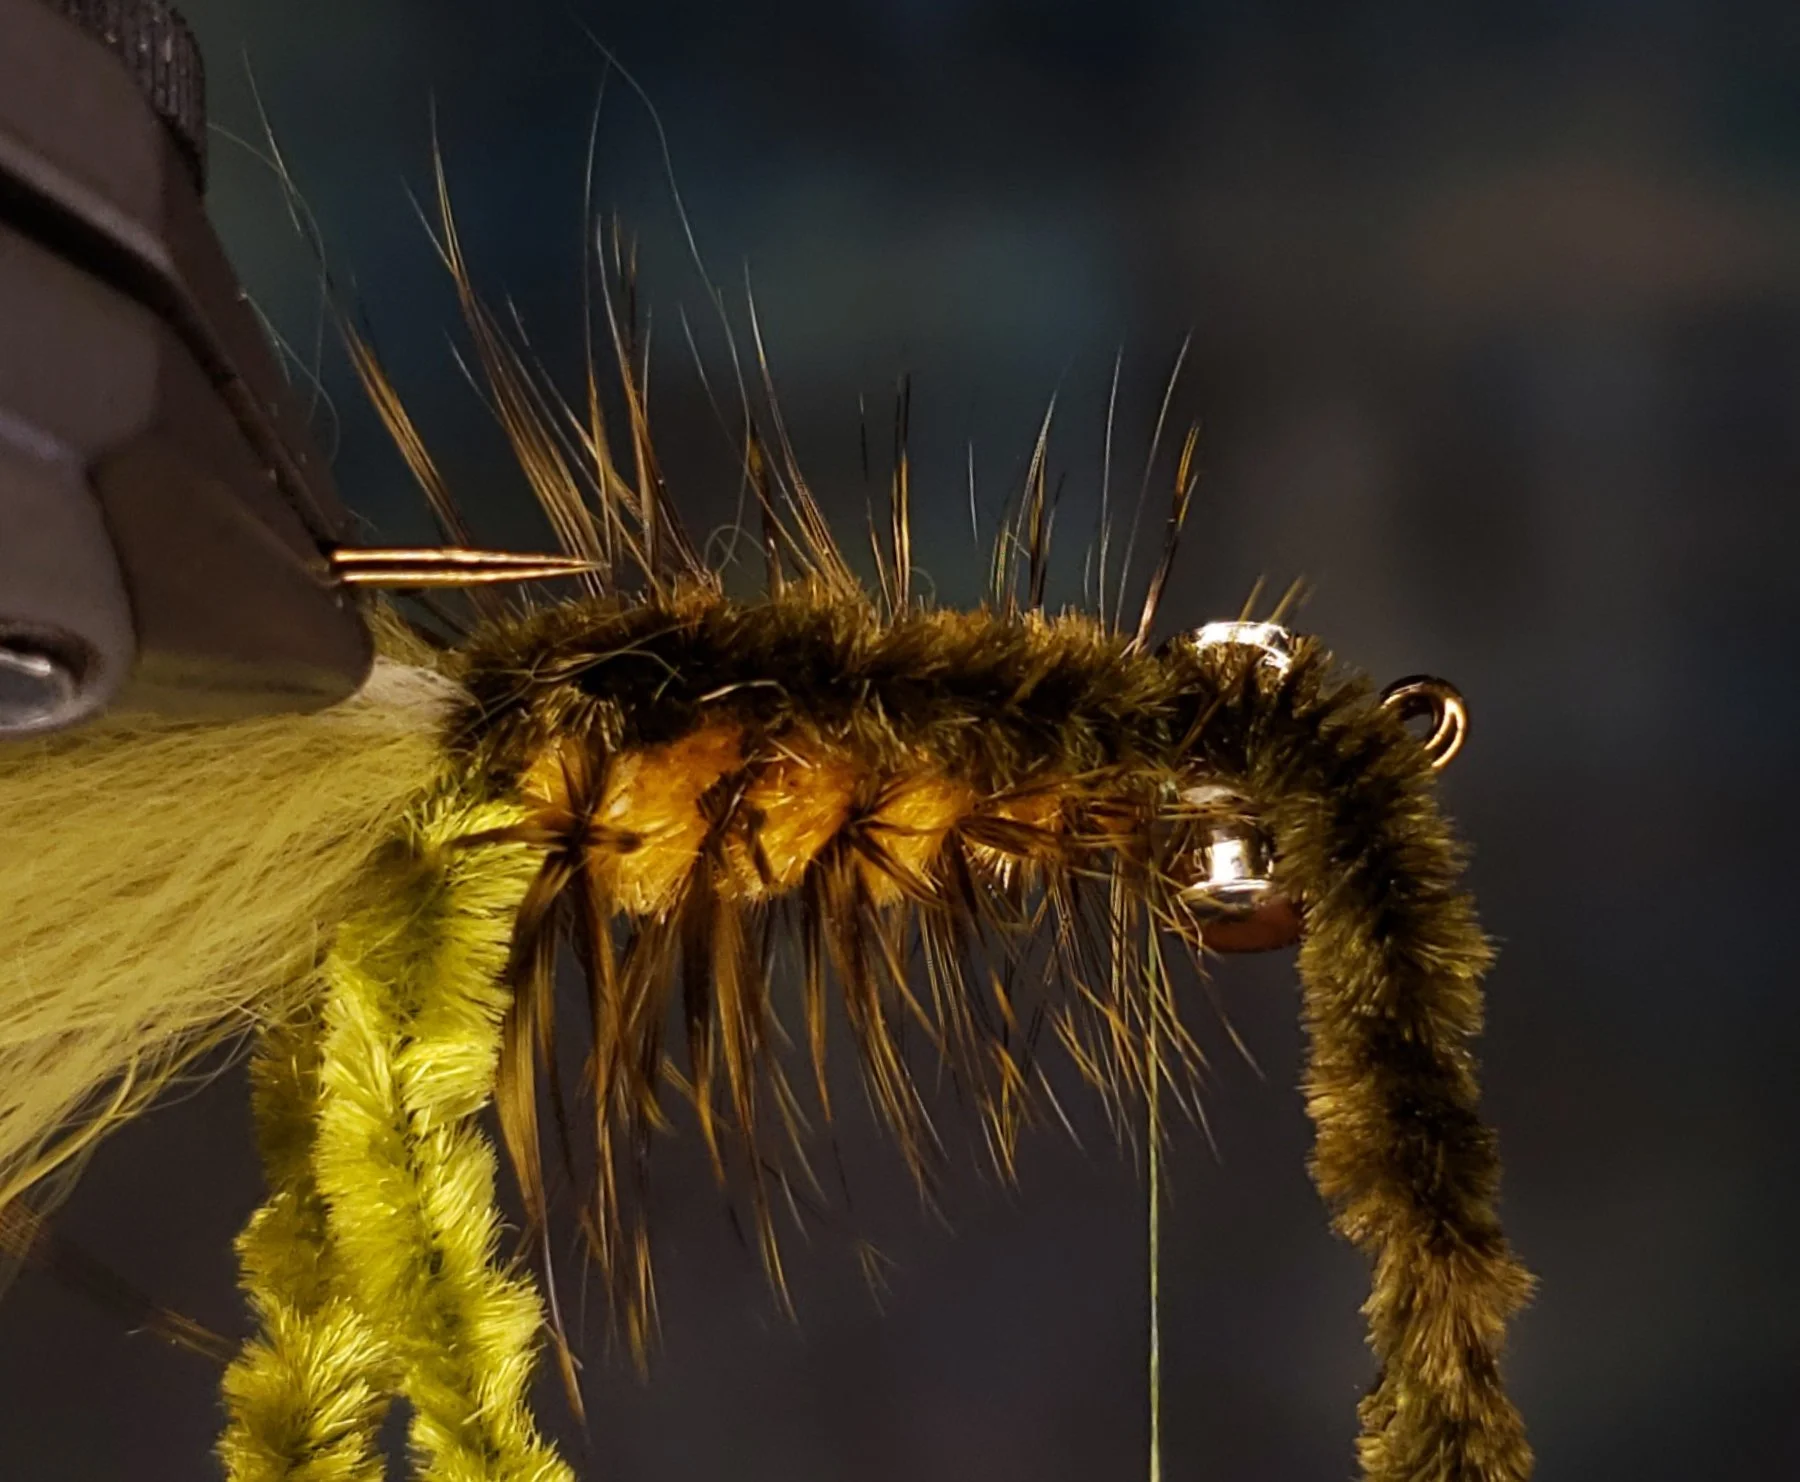
Back, part two
Grab the longer middle back chenille. Hold it taut and twist it a little. This helps secure the chenille fibers so they don’t pull out later (when it’s fished). Keep it taut and tie down behind the hourglass, where you tied down the hackle. Do NOT trim the excess… we’ll use it in a minute.
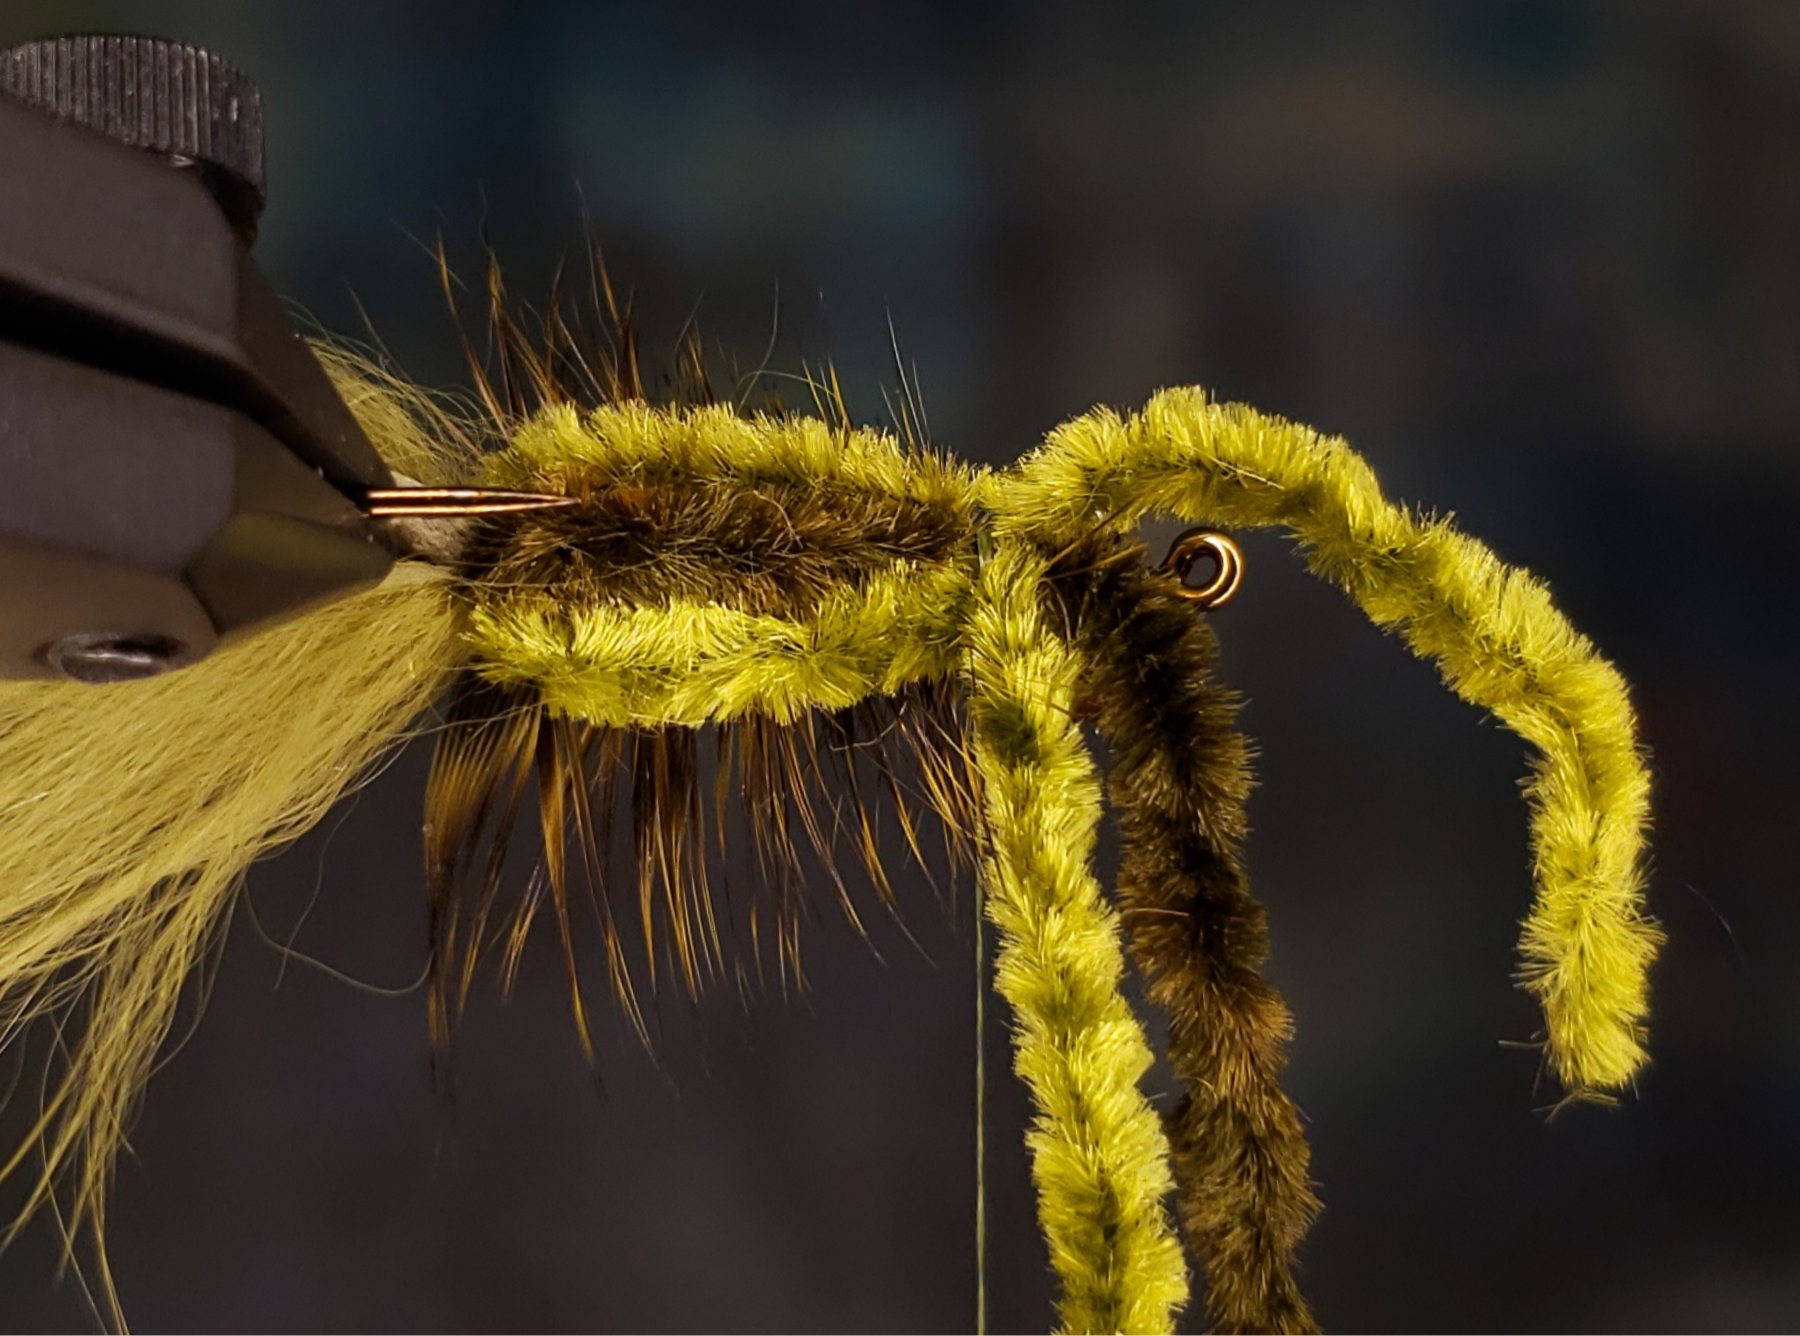
Do the same with the other two chenille strands, twisting then tying down. This time, go ahead clip the excess. Make three or four extra wraps to help secure everything. A drop of cement isn’t a bad idea but probably isn’t necessary.
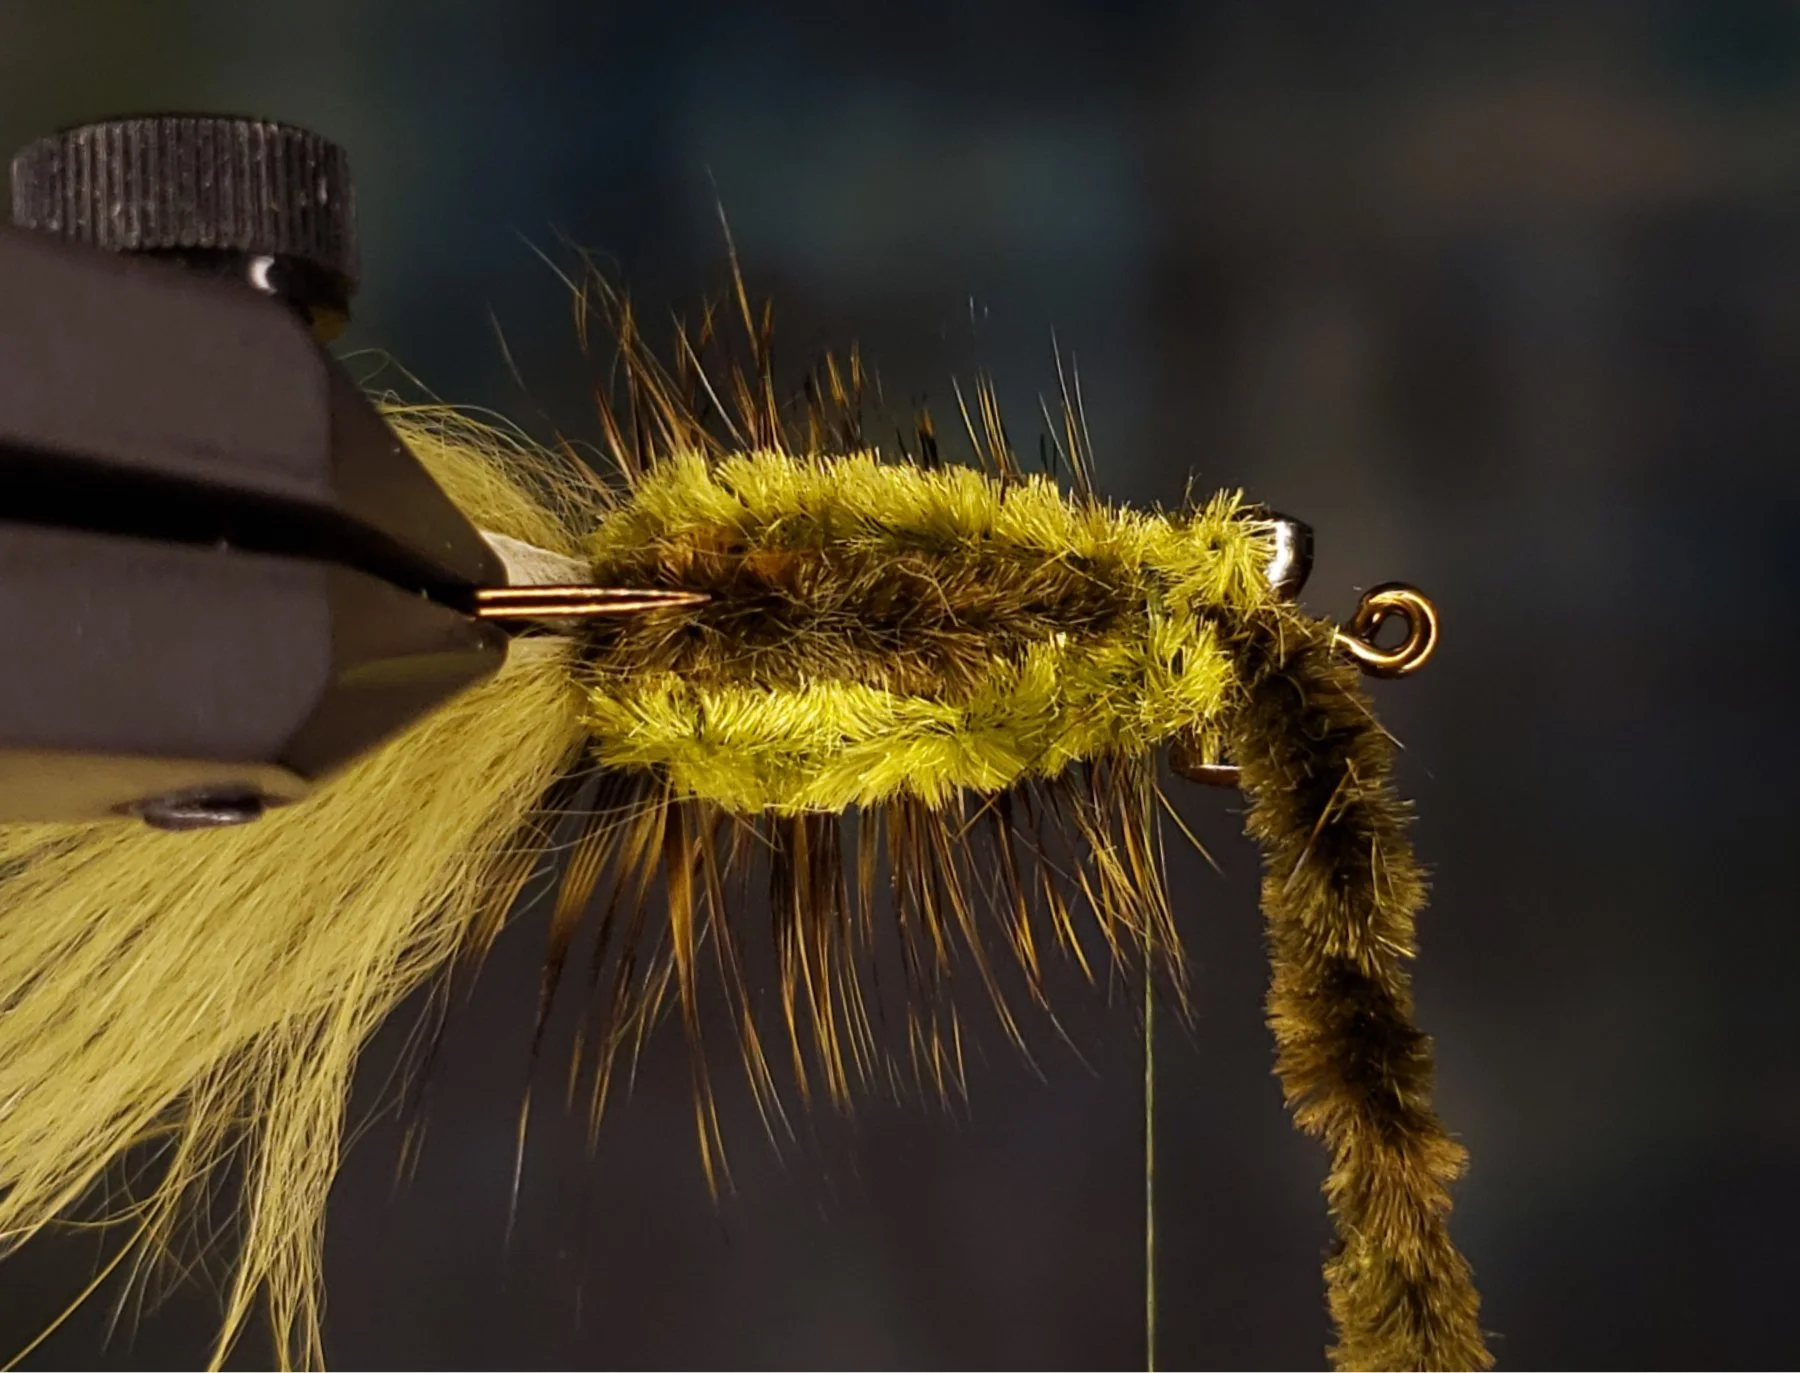
Wrapping the Tail
Now we just have to build the tail by covering the hourglass with the chenille. You can just wing it by crisscrossing and going around however you like, or you can follow this MapQuest itinerary:
1) Take the chenille over the top to the far side, in front of the hourglass.
2) Bring the chenille under the hook just behind the hook eye to the near side.
3) Go over the top and take the chenille diagonally to the far side behind the hourglass.
4) Go diagonally under the hook through the middle of the hourglass to the near side in front of the hourglass.
5) Go over the top to the far side just behind the hook eye, then diagonally under the hook through the middle of the hourglass to the near side behind the hourglass.
6) Take a full turn behind the hourglass and tie off with four tight turns of thread. Clip the excesss.
Take several more tight turns of the thread so there is a distinct neck-like gap. Finish off with a six turn whip finish. This is quite easy to do by hand, but a long-reach whip finish tool can work. Incidentally, if you don’t know how to whip finish by hand, it’s a handy skill (no pun intended) to have so I suggest taking some time to learn. I very rarely use a tool, and then it’s only to show someone how to use one.
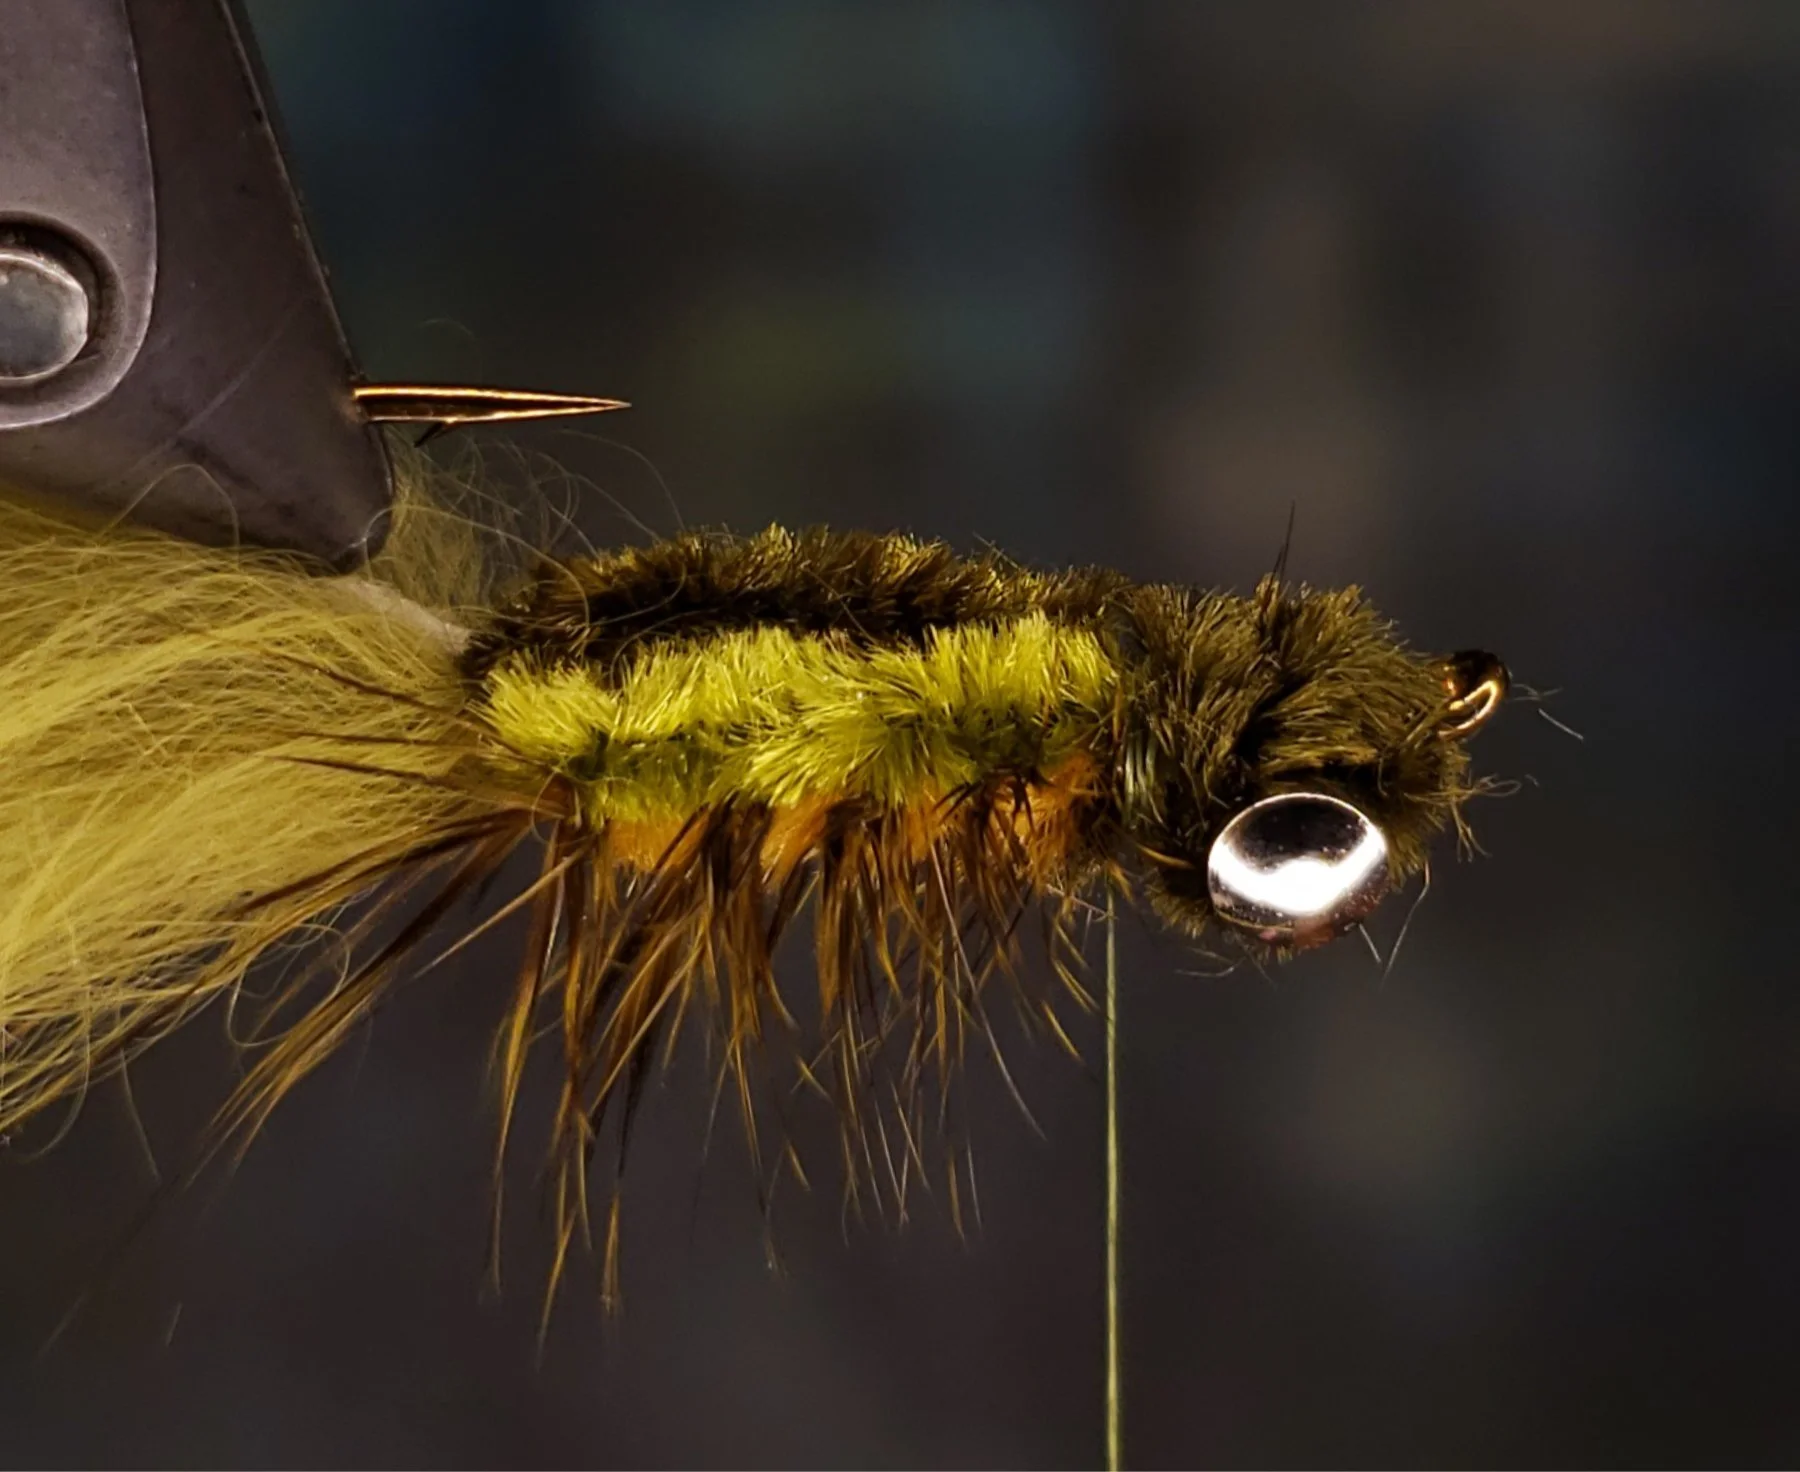
Finishing Up
Flip the fly back over and trim the hackle fibers on what is now the underside of the fly (technically the top of the hook shank). You just want to trim enough so the fly will rest somewhat flat with the hook point up.
Add plenty of cement to the thread wraps in the neck area. I do this by placing having a drop on my bodkin, then running the needle through the neck area. The cement gets wiped off onto the thread wraps. A thinner cement is best here to soak into all that thread and keep everything in place. I’ve used thinned lacquer (yep, from the hardware store, thinned with lacquer thinner) for thirty years and it’s never let me down, is far superior to any commercial head cement I’ve ever tried.
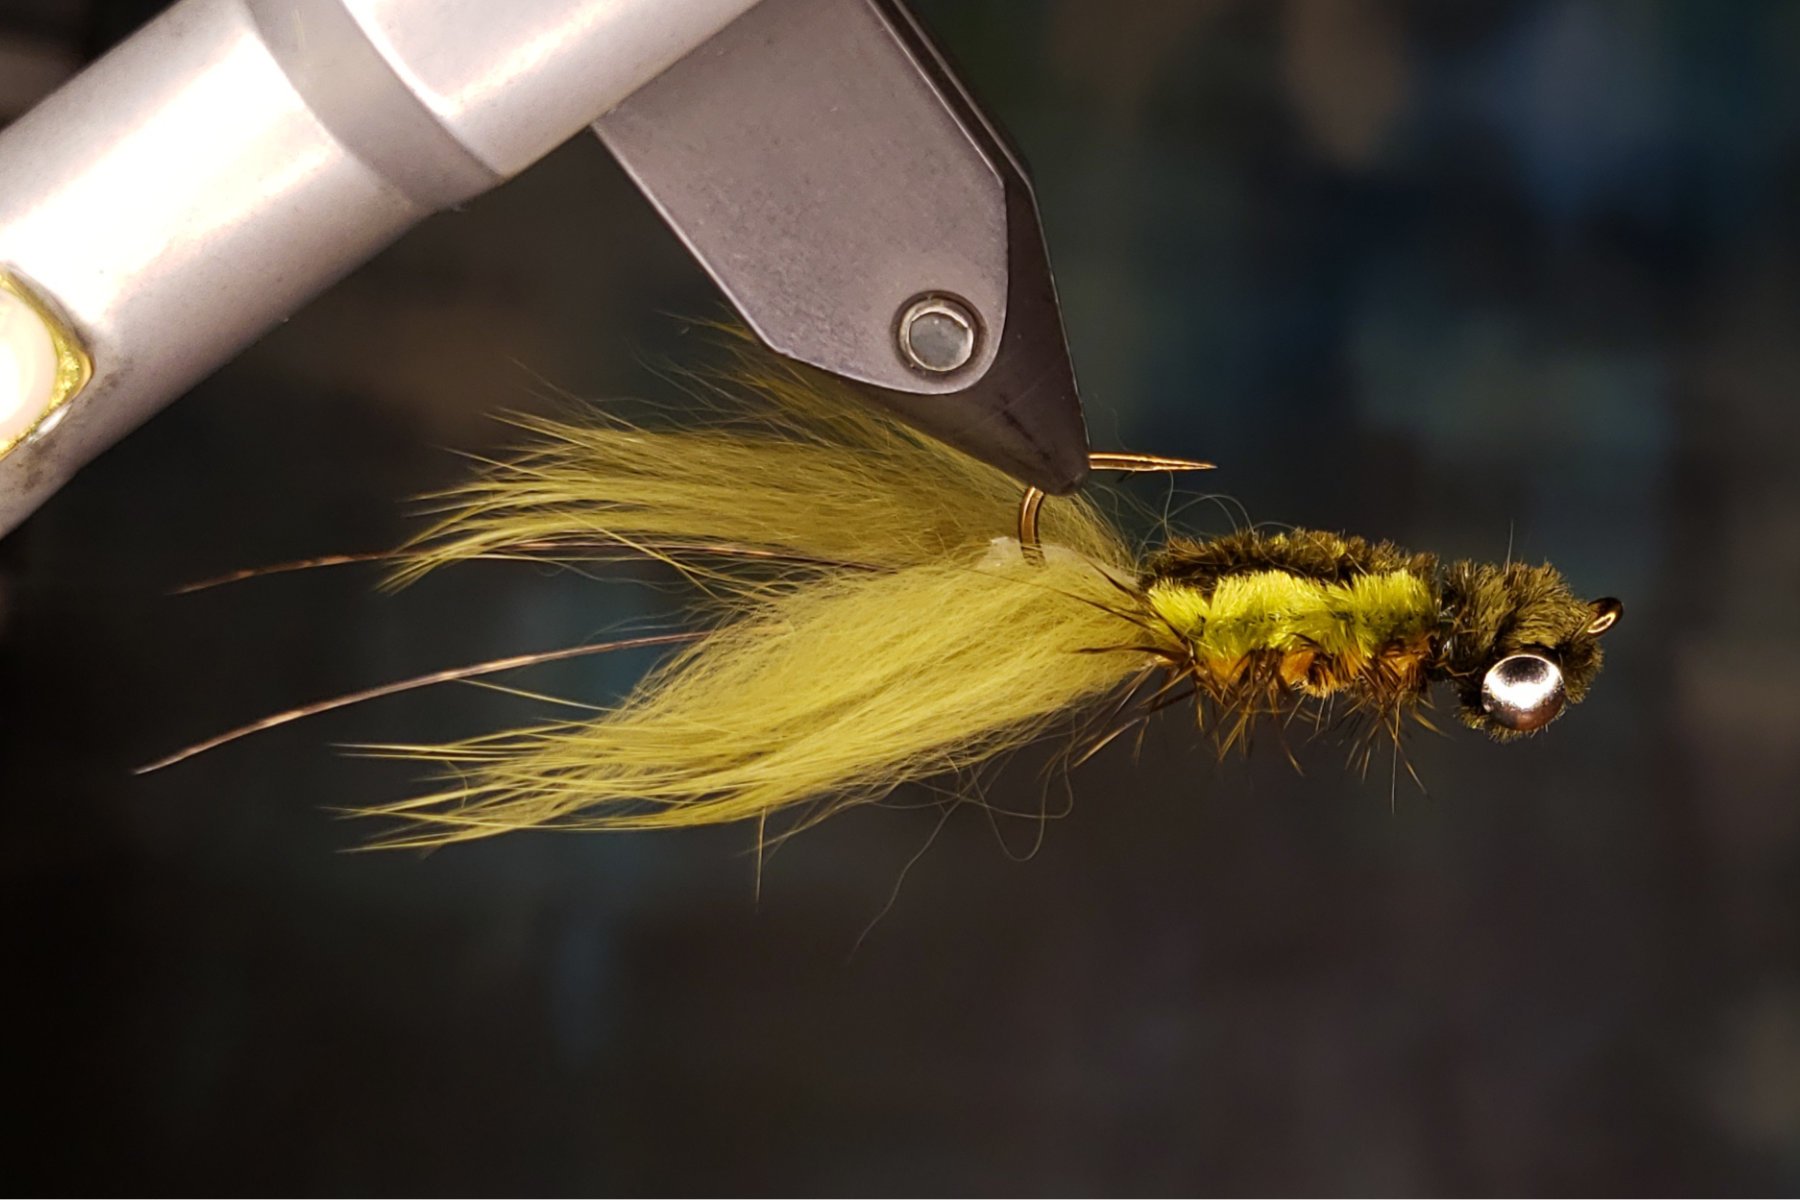
And there you have it! A Cumberland Crayfish ready for battle! Have a look around in your lakes and creeks and note the colors of local craws. I have experimented with fun colors like adding a bright orange belly or a firetiger version, but nothing works like ones that are colored just like what is found in the water you’re fishing. To me, that’s just a testament to how realistic this crayfish pattern is when fished right.
If you have some good success with this pattern, consider a print of my “Cumberland Crayfish” painting as a memoir for your tying area.
Let me know how you do and feel free to leave a comment below. Thanks for reading and trying out the patten.
Happy hunting!


“Cumberland Crayfish” 8×10 acrylic on canvas.